
Just before Google I/O 2018 kicked off, we showed you how to install Android P Developer Preview on Moto Z. This was an unofficial port of Android P Developer Preview, as we know, Android P DP1 was just released for Google Pixel devices. However, XDA Recognized Developer erfanoabdi had been doing to got it booted by using a modified system image from the Google Pixel XL release. At the time there were a lot of bugs in the port and it was not easy for an intermediate user to use it as a daily driver. Anyhow, the developer has put a lot of efforts in ironing out the bugs and he has just released the Android P Developer Preview 2 port for Moto Z. In this post, we are going to tell you how to install Android P Developer Preview 2 on Moto Z.
Such unofficial ports always come with their fair share of issues. The reason is simple, they are not officially developed for your device. The developers put a lot of efforts and hard work in making these images available for your devices. So, if you face a bug here and there it’s justified and we shouldn’t complain about it much. Anyhow, this Android P DP2 Port for Moto Z is quite stable and most of the bugs which were present in the first port have vanished. The radio, Wi-Fi, camera, Bluetooth, audio, NFC, GPS, and more are now working, things like the flashlight toggle do not work. Before the second SIM slot wasn’t working but in this new update it’s now working. Unfortunately, Google Camera app remains broken so the developer suggests you to use the third party camera apps in order to take photos on your Moto Z.
This is not an official Android P DP2 update, therefore you must have a custom recovery install your Moto Z. Now, without any further ado, let’s jump straight to the guide on how to install Android P Developer Preview 2 on Moto Z.

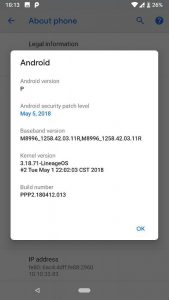
Table of Contents
Prerequisites
- Before proceeding any further backup all your important data like Emails, Messages, Personal Photos, and Videos.
- Download and install Moto Z USB Drivers on your Windows PC and MAC.
- Make sure USB Debugging mode is enabled on your Android Device. You can enable USB Debugging by going to Settings > Developer Options.
- The device should be charged up to 70% to avoid any unexpected shutdowns. This is very important, any shutdown during the process can damage your device permanently.
Downloads
How to Install Android P Developer Preview 2 on Moto Z
- First of all, download Android P Developer Preview 2 on your desktop PC.
- Now connect your Moto Z to the computer and transfer the downloaded zip files to the root of your phone’s internal storage.
- Disconnect the Device and turn it off.
- Now boot it into TWRP (Recovery Mode) by pressing and holding Volume Down + Power keys at the same time. Once the TWRP logo appears, you have successfully booted into the recovery.
- Go to the Main Menu of TWRP Recovery and tap on Install
- Locate the ROM .zip file that you have already transferred to the internal storage of your phone earlier.
- Select it and proceed with the installation by swiping the confirmation button to install the ROM.
- Reboot your device now.
That’s it! This is how you can install Android P Developer Preview 2 on Moto Z.


